
Do you have plans on removing the Honda Accord OEM head unit? Here we can provide you with information about this process and how to complete it using several actions that any user can complete it by himself!
Removing The Honda Accord OEM Head
If you want to complete the removing Honda Accord OEM head unit in a few steps then first you need to learn how to complete the whole process! Below you can find steps on how to remove the Honda Accord head unit easily!
Dash Trim Elimination
The trim above the glove box was the first trim I took off. This one is really simple! Simply open the glove box, hold the bottom of the trim with your fingers, and pull outward, beginning on the side of the trim that is closest to the head unit on the left. From left to right, slowly remove each clip from the trim. This will reveal a screw on the OEM head unit’s bottom right side.
Check also how to get an Accord code for your stereo system!
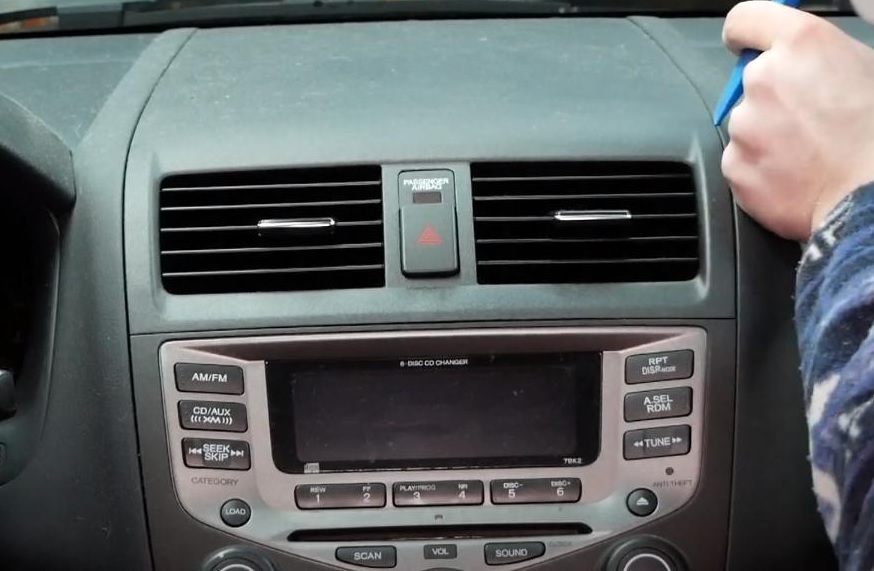
The little trim piece between the head unit and the steering column is the next place to start. To remove this one, you might need to use a wedge. To avoid scratching the trim, I advise using a plastic trim removal tool. I was able to pull the edge of the trim piece closest to the head unit using my fingers, but if it’s stubborn, you might need to use a specialized tool. Another head unit screw will become visible once this trim piece has been removed.
The two screws on the side of the device can be removed once both trim pieces have been taken off and the screws are visible. To access the last 2 screws needed to remove the head unit, move to the middle console and cubby.
Center Console & Cubby Removal
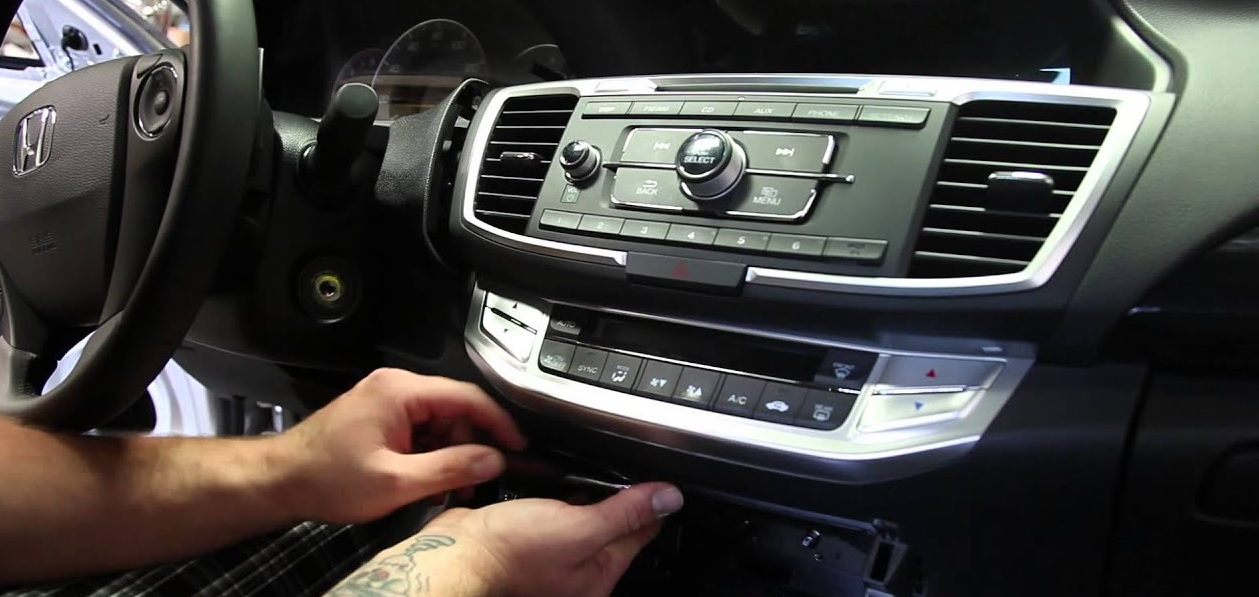
You must take off the center console trim and cubby to have access to the final two screws on the OEM head unit in your Honda Accord. To do this, start by prying up the back side of the center trim piece. Start your investigation from within the center console. Sweep the rear part of the center trim piece up by prying it up or opening the center console. Beginning here, carefully pry upward until you start to pop the first few trim clips. No screws are holding in the long piece of plastic that extends from the center console to the cubby area. Up until you reach the shifter, move forward.
The quickest way to remove the middle trim piece is to put your car in D1 once you get to the shifter. Put your car in D1, engage the emergency brake, and keep taking out the middle piece until all of the clips are released. Except for the power socket that powers the accessory plug in the front compartment, all the clips have now been undone, and the trim piece will be almost completely removed. Pull the plug out of the panel’s rear by holding it there. Once the plug has been taken out, you can remove the middle trim piece by circling your shifter.
You can now see two screws on the bottom of the cubby after removing the center trim. Unscrew these two fasteners. The top of the cubby has two additional screws. These are challenging to see and even more challenging to get rid of. To access and remove these two screws, use a short screwdriver. Next, pull the cubby out by the handle.
Taking The Head Unit And Its Parts Apart
Once the cubby has been removed, you may now reach the last two screws and remove your OEM head unit from the space above the cubby.
You can start taking out the head unit now that all of the screws have been removed. The item also contains clips that hold the plastic trim in place in addition to screws. Start the head unit removal process by carefully prying upward after wedging the bottom edge with a flat surface. You should be able to start removing the unit after you hear the clips pop. Once the unit is free, unclip all of the wirings that are attached to the emergency light switch, climate control, and head unit. Then, remove the device from the dashboard.
You’ll need to reuse and transfer a number of the dash trim’s parts to your new Metra dash kit. This applies to the vents, climate control, and switch for the emergency brake. You must take the head unit out of the plastic trim to reach these. The climate control unit should then be removed after removing the head unit. There are a few screws to remove on the climate control device as well. To completely remove the temperature control unit, you’ll need to pop off the two control knobs on the face after removing those screws. View images.
Final Actions
Several clips are holding the emergency/hazard button in place. To move the button out toward the trim’s face, gently peel them apart.
Go to the vents at last. Pull the vents off the old trim after removing the last few screws. You should be able to put the parts back into your new aftermarket dash kit because the remaining plastic dash trim should be empty.


